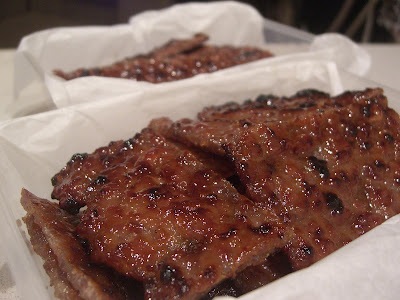
This post is about making Singapore/Malaysia style bakkwa (肉干), or savory pork slices, at home.
There are numerous recipes for this online, but none of them hit the mark for me. It took many attempts over several years, going through different recipes and techniques, before I put together a recipe that can be easily made at home, which I feel closely resembles the commercial product.
Commercial products are priced upwards of $50/kg in Singapore, and even up to $100/kg when they are exported to places like Australia. Yet, making it at home only cost $10+/kg in terms of ingredients, so it is something that is definitely worthwhile making at home. Also the process for making it is not really complicated.
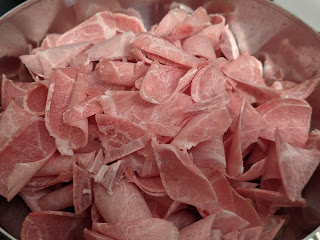
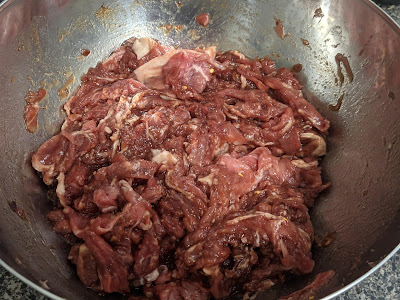
First the main ingredient, pork. Most online recipe will use minced pork, but I like to use thinly sliced pork (1mm thickness). The texture of the final product is different. The former is softer, while the latter is more chewy. Both types are sold commercially: 切片 (sliced) and 碎肉 (minced). The sliced variety is typically $10/kg more expensive than the minced variety.
If you use minced pork, go as close as 20% fat/80% lean meat as possible. For sliced pork, go with a cut of meat that has a good proportion of fat. I use the "collar butt" cut from Costco, which typically cost $10.99/kg for a 3kg slab.
For slicing, I go with a cheap manual meat slicer like this:
I have written about the crappy plastic gears in cheap electric slicers, so never am I going to get another one!
I will typically cut the meat into 1kg slabs, then freeze them in the freezer. This prepares them for slicing when I am ready to make a batch.
If you are using sliced pork, after slicing, leave them alone for an hour or two for the meat to thaw.
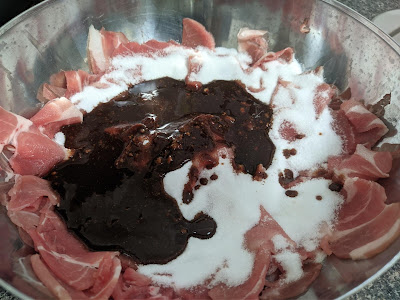
Then marinate the meat with the following ingredients:
- 2 tbsp soy sauce
- 2 tbsp sweet soy sauce (kecap manis)
- 2 tbsp fish sauce
- 1 tbsp oyster sauce
- 2 tbsp rose wine
- 2 cubes fermented red tofu (玫瑰腐乳)
- 1/2 tsp pepper
- 1/2 tsp five spice powder
- 90g sugar
What I'd typically do is to mix all the wet ingredients together in a cup, add the dry ingredients, then stir thoroughly. It's best to mash the fermented tofu with a fork before stirring. This is importantly because you do not want any lumps of fermented tofu in your marinate. Finally pour the marinate into the pork and stir thoroughly with a spatula.
Spend a bit more elbow grease doing this so that the pork are evenly coated with the marinate, otherwise you might end up with some pieces tasting very salty or sweet, while other pieces tasting rather bland.
Note that the critical ingredient here is the fermented tofu, which really enhances the taste of the final product. Regular versions are fine too, if you can't find the red variety. I can't remember where I discovered this, because most online recipes do not include this ingredient, but it is the secret sauce that makes all the difference! I have omitted the rose wine sometimes, or replace it with mirin. I also add a teaspoon of chili flakes to spice things up when I feel like it.
Once you have thoroughly mixed the pork with the marinate, leave it for 15 minutes or so. Now we come to the second step, creating thin sheets of pork. Most recipes will tell you to lay a lump of pork on baking paper, lay a sheet of clingwrap over it, and flatten the lump using a rolling pin. However, it is really difficult to create a uniform sheet of consistent thickness using this approach. You will find invariably that there are some high and low spots in the sheet, and this critically affects the texture of the final product.
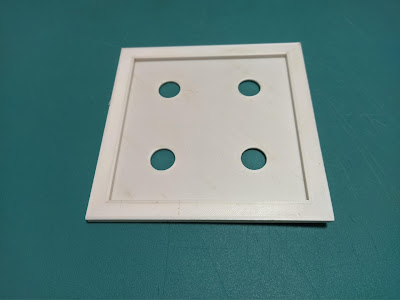
My solution was to create a small tray like this:
Mine was printed using a 3D printer, but I can imagine making this using balsa wood or something equivalent. The inner dimension is 15x15cm, and the depth is 3mm. The round holes are there to make it easier to release the pork sheets once they are set.
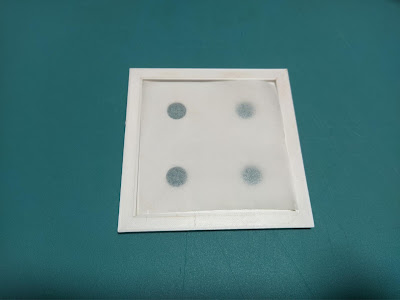
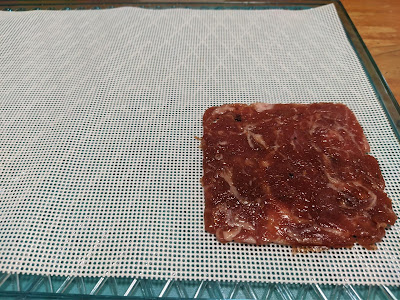
To use this tray, cut a piece of baking paper and place it at the centre:
Now scoop some pork and place it on the baking paper:
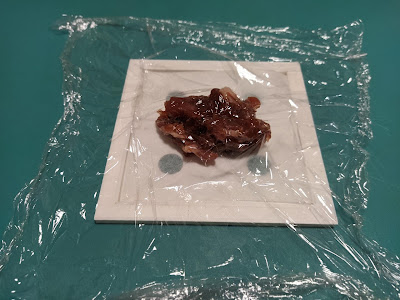
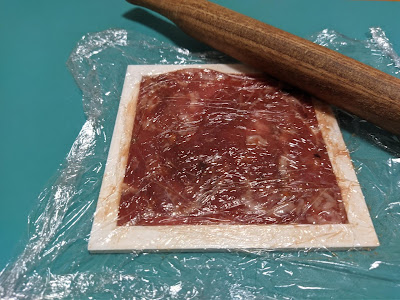
Cover with a sheet of clingwrap and flatten with a rolling pin. Then cut off any excess meat at the edges with a pair of scissors.
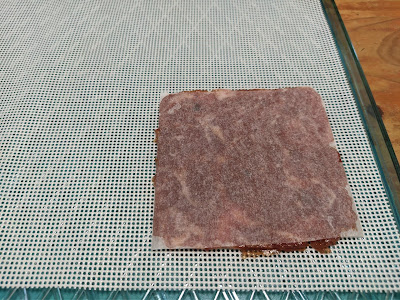
Now, gently peel off the clingwrap and invert the tray onto a perforated silicon mat (I will talk about that in a second).
Then slowly peel off the baking paper.
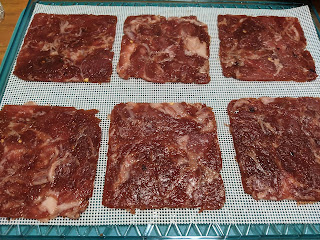
and we are ready to make the next piece. I am able to fit 6 pieces onto one silicon mat.
Using this method, it is very easy to ensure that each piece of bakkwa has uniform thickness throughout, which ensures consistent texture in the final product. And each piece is already the right size without additional cutting or trimming.
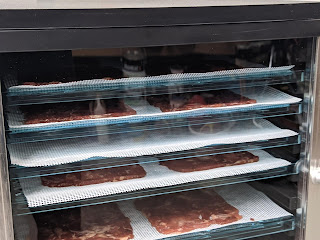
Now let's talk about the perforated silicon mat. In most recipes, the next step is to place the pork pieces in the oven and cook them under low temperature eg. 120c. But I find that a better way is to dehydrate the pork pieces at even lower temperatures (50~60c). I do this in my dehydrator for 2 hours at 50c.
If your oven has a low temperature setting, you can use that as well. I have also done it in an oven by setting it to 100c and keeping the door ajar with a piece of rolled-up towel. In this case, the temperature was maintained at around 70c, and I only have to do it for 30 minutes.
The perforated silicon mats are made for dehydrators, and is great for keeping the bottom of the pieces dry. If you use baking paper like most recipes suggest, the bottom will be damp. Even worse, at higher temperatures, some of the marinate will be released, making the final product less tasty.
Whichever method you use to dehydrate the pork pieces, the objectives should be 1) to *not* cook the meat 2) to dehydrate them just enough so that they can be lifted off the silicon mats in one piece easily. If this is done correctly, you will find very little loss of marinate, and all the yummy goodness remains embedded within the pork pieces.
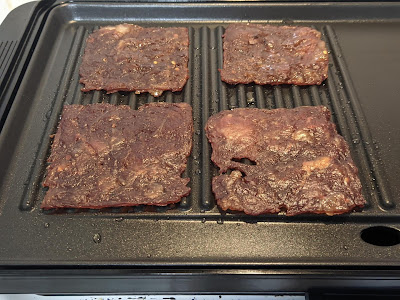
The final step is to cook the pork pieces. Now, most recipes will suggest you bake them in an oven at high temperature (200c) using the grill mode. I have also tried using air fryers. However, I find that the best result can only be obtained using a traditional grill. This is due to the level of control you can achieve for each piece. Using the oven or air fryer, I find that the edges typically come out over-cooked, while the centres remain undercooked. Also you have very little control over the level of charring.
Traditionally, bakkwa is grilled using charcoal grills, so if you have access to that, that is definitely the top choice. However, a more convenient method will be to get a cheap electric grill plate that can be had for as low as $25 at the stores (cheaper if you buy second hand). Then simply turn it up and grill each piece for about 2 to 3 minutes on each side.
Now, this step takes some experimentation to get right, since it depends on the temperature of your grill and how chewy you like the final output to be. In general, these are the factors you are trying to balance:
- The longer you cook the pieces, the more chewy they are going to be. But if you cook them for too long, they may become too tough. If the cooking time is too short, they will be soft and have that "porky" taste.
- You want the grill plate to be hot, but not so hot that it will immediately char the pork pieces. As for the final product, you want the pork pieces to be slightly charred, but not *too* charred. This can be achieved by turning the pieces over regularly to examine them.
Note: If you find the dehydrated pieces turning pinkish when you grill them, that's a sign that the pork pieces have not been dehydrated enough. I was reminded recently when I accidentally ended the dehydration process early (1 hour instead of 2 hour). The "porky" taste in the pieces were pretty obvious after I grilled them. This would not have happened if I didn't make this mistake.
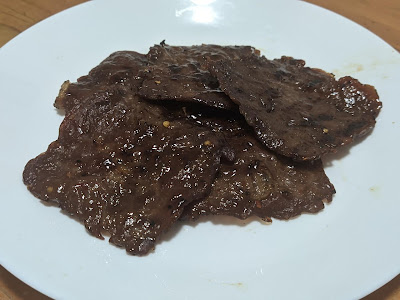
Once the pieces are cooked, rest them somewhere standing so that any excess fat can drip away. A 5 to 10-minute rest for each piece is more than sufficient.
Despite my somewhat lengthy essay above, the actual process is actually quite simple.
- Prepare sliced pork (no preparation if using minced pork from supermarket)
- Add marinate
- Make pork slices
- Dehydrate pork slices
- Cook pork slices
Actual working time (minus wait time) is only about 40 minutes for 1kg pork.
Important differences from existing online recipes:
- Use sliced pork for more chewy texture similar to 切片肉干 that can be purchased commercially
- Use fermented tofu in marinate
- Pork pieces should have uniform thickness for consistent texture in final product. My solution is to make a special tray for this.
- Dehydrate the pork pieces using very low temperature, not cook them. This ensures maximal preservation of marinate in pork pieces.
- Cook the pork pieces on electric grill for better control.

Damn that looks good
ReplyDelete